The Bird Door
2016-11-13My girlfriend has a pet lovebird. When I was a kid, I had parakeets. But I was careless with going in and out of the house while the birds were out of their cage. One day, they flew away and I never saw them again. When my girlfriend and I were planning to move in together, I was very excited about having a pet bird again, but I didn't want to repeat that mistake. I knew we'd both be coming and going from the apartment at different times. And with a very adventurous, curious bird that needs at least two hours out of its cage every day, that was going to be a problem.
I figured other bird owners must have this problem too, so I searched online for solutions. I wanted to have a double door of some kind to keep the bird safe. I wanted something like what zoos have for their free-flight bird exhibits. Since we're renting, it would have to be something that could be installed temporarily. However, I wasn't really able to find any products that I could buy.
At first I was thinking about using something like a curtain rod. There are ones that hold themselves up with friction by pushing against the walls. I thought I might hang "strip curtains" from that. But ultimately, I decided that curtains might not be secure enough. I decided to try building a real door using the same principle of the curtain rods of pushing against the walls.
Push clamps
I didn't know how to achieve the pushing against the walls. I started searching for "push clamps", not even knowing if those existed (they do, apparently). But I eventually decided I could do what I wanted with just two blocks of wood, a threaded rod, and a nut. I screwed the threaded rod into one of the blocks, but not all the way through. Then I drilled a hole all the way through the other block, large enough to let the rod pass through freely. By putting the nut on the rod in between the two blocks, I could control the distance between the blocks by moving the nut.
Prototype
Although my pushing mechanism seemed to work pretty well, I wasn't sure if it would really hold a door in place securely enough. I needed to build a full prototype. My idea was to build a frame just large enough for the door and then have the "push clamps" on the sides to hold the frame in place.
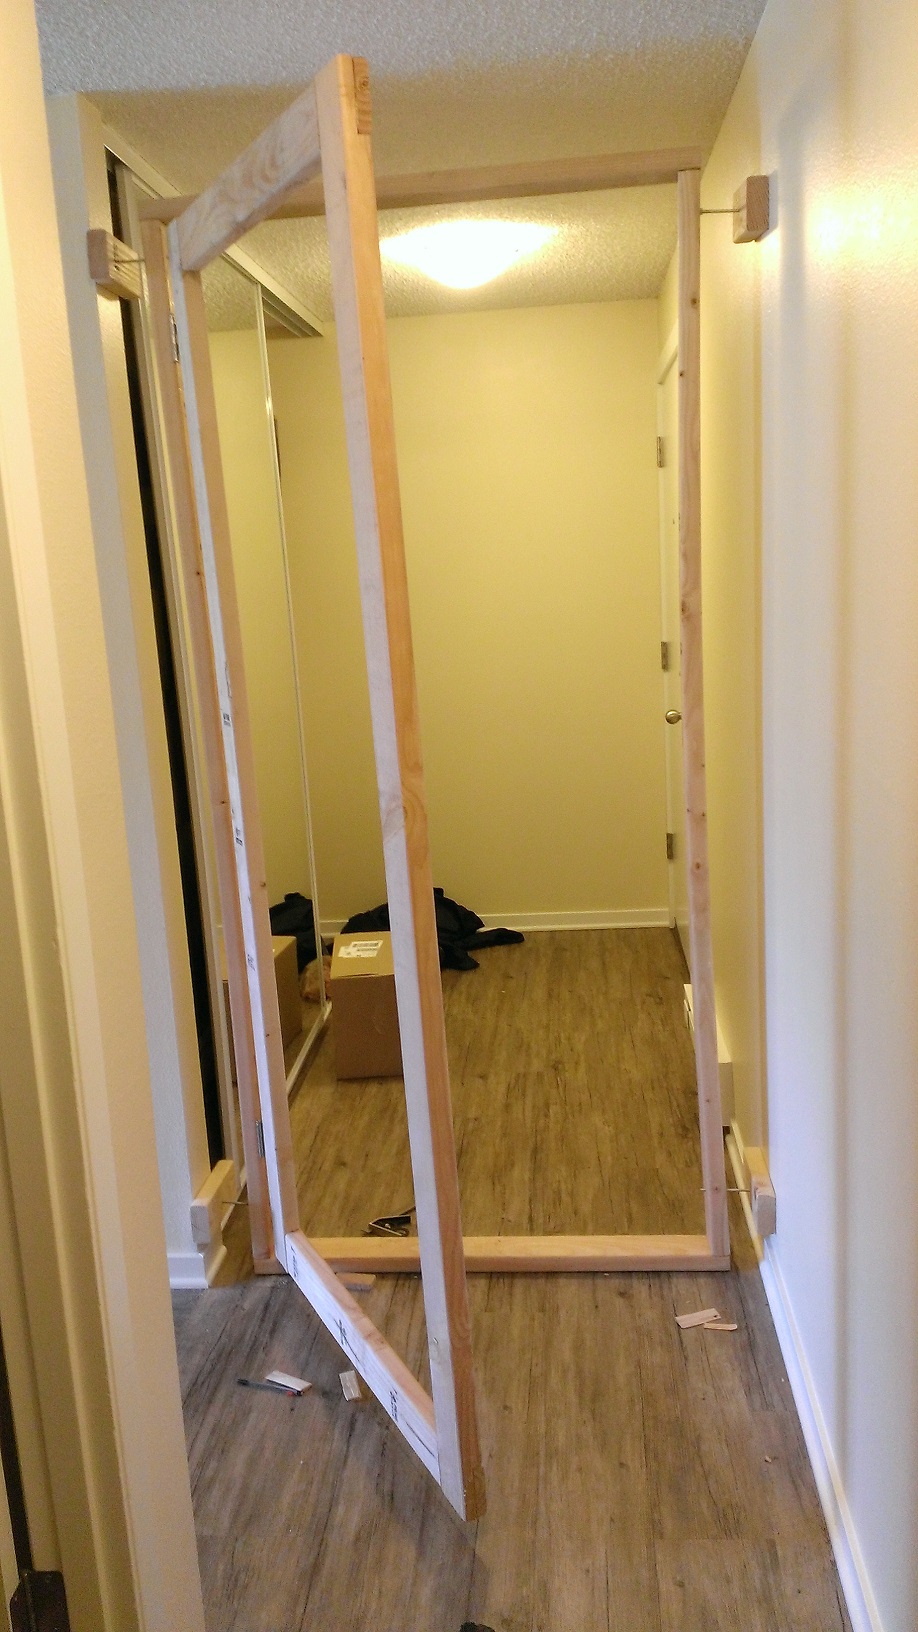
As you can see, the frame sits on the floor, so the clamps don't have to actually hold the weight of the frame and the door. All they need to do is keep the frame from sliding out of place. And they seem to work well for that.
I was actually hoping the prototype could just be used as the final product, but I didn't know yet where we were going to be living once we moved in. My apartment at the time was just about the perfect layout for this idea. It had a long hallway upon entering the front door, which gave me the two walls I needed to push against. But I knew wherever we moved into might not be so ideal. So I just did my best to make the design very general.
Materials
One thing I needed to do was make sure that the materials and parts I was using would be safe for the bird. There was no chance that the bird wouldn't end up chewing on the door eventually. For the wood parts, I used untreated Douglas fir 2x4s. For the metal parts, I used stainless steel. The only exceptions were parts that would be out of reach for the bird because they're on the opposite side of the door.

Here are some links I found helpful in selecting parrot-safe materials:
- http://www.mdvaden.com/bird_page.shtml
- http://www.naturalbirdco.co.uk/safewoodguideforparrots.html
- http://www.tgpa.com/Plants.html
- http://www.birdtricks.com/blog/safe-metals-for-parrots/
The door itself
The door itself is simply a hollow rectangle of 2x4s. The 2x4s are connected with half lap joints and glue. I had pretty much no woodworking experience when I started this project and very limited tools. But after watching a lot of Paul Sellers videos on YouTube, I decided to try making the joints by hand with a hand saw and a chisel. It took a long time, and I wasn't able to get the faces of the joints very flat, but it worked out. Even with the big gaps I had in the joints, they are very strong and rigid.
Frame
The frame that holds the door is also just a rectangle of 2x4s, but larger and with the boards rotated 90° so that the frame is "deeper" than the door. I got lazy and just used butt joints with screws for the frame — no glue. This is not great, because the frame is a bit wobbly. But it worked alright because my push clamps hold the frame in place and keep it from wobbling.
Closer
The last thing I did with the prototype was install an automatic closer. I went and bought the cheapest one they had at Home Depot, which was around $10 or $15. It was pretty easy to install. I don't think I had really planned out where the closer would go when I started the project, but fortunately I had room to mount it on the frame without it getting in the way of the door. To stop the door from swinging beyond parallel with the frame, I simply nailed a small piece of wood to the top of the frame in the right spot.
Final location
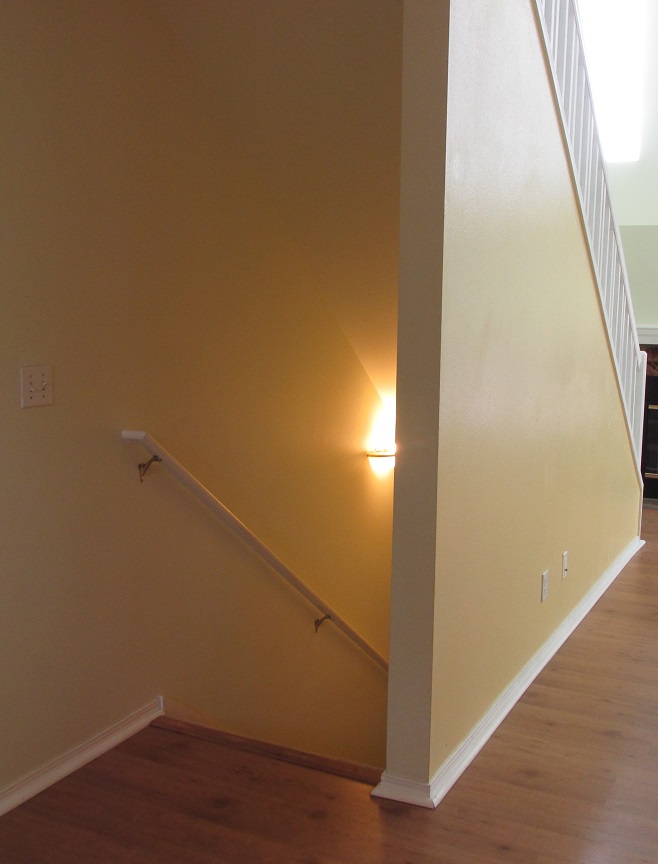
When we decided where we were going to live, I wasn't sure that I'd be able to make the bird door work there. It's a townhouse and the entrance leads immediately to a set of stairs. There isn't really a good place for the door at the bottom of the stairs. At the top of the stairs, the wall on one side ends right at the top, so I can't use my push clamps against the walls like in my previous apartment.
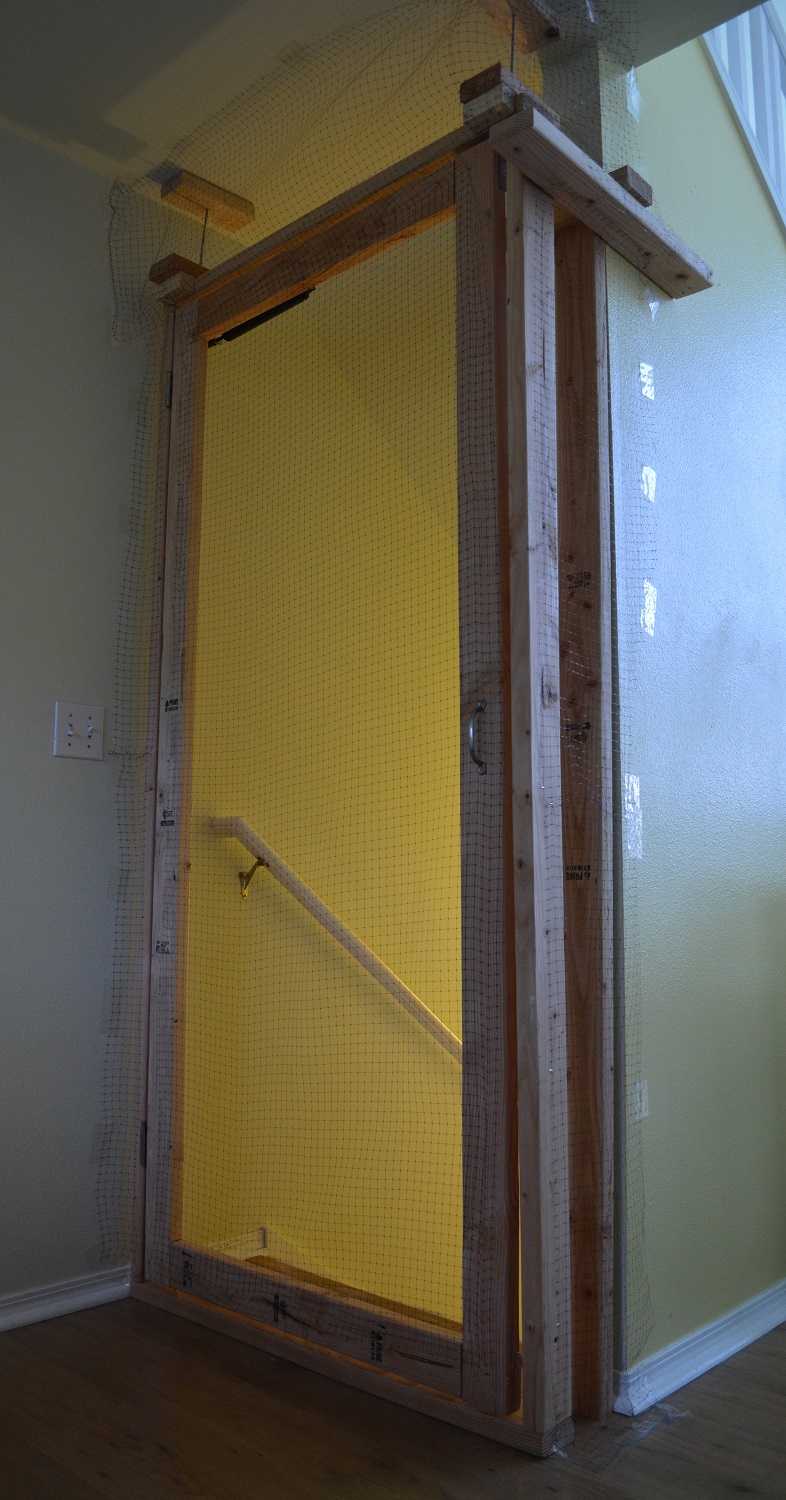
Since I don't have two walls to push against, I decided to use my clamps on the ceiling instead.

Clamping against the ceiling worked fine for keeping the door in place. However, the door no longer closed properly because the frame around the door was sagging out of square. I hadn't realized that when I was using my clamps against the walls they were keeping the frame from sagging side-to-side. The ceiling clamps, however, don't prevent that.
Wall grabber
The solution I came up with is something I call the wall grabber. It's basically an 'h'-shaped piece of wood that cantilevers off the end of the wall. This effectively extends the wall a bit, allowing me to use that wall to hold up the door frame and keep it from sagging to the side. As with the rest of the project, the grabber is not permanently attached to the wall. I built the grabber to fit the thickness of the wall as closely as I could so that it would mostly just hold itself up. But to make sure it stayed in place, I also just propped it up from the bottom with a 2x4 that leans against the wall.

This works surprisingly well, even though the grabber isn't really attached to the wall or the frame in any way.
BirdBlock
The final thing that needed to be done was block the holes between the frame and the walls, and in the center of the door itself. I used a product called BirdBlock, which is pretty much like chicken wire, except it's made for gardening and it was cheaper because it's plastic.

I wasn't sure if the holes in the BirdBlock would be small enough to keep the bird from sticking his head in. I'm still not sure, actually, because he's never tried to do that. I was also wondering whether he'd be able chew through the wire, since it's pretty thin. Again, I can't say for sure because he doesn't really try to do that, but it seems like it might be too flexible for him to chew through it easily.
To attach the BirdBlock, I just cut it to the right size and then stapled it into place (using stainless steel staples). Since I didn't want holes in the walls, I just used tape to attach it to the walls. Surprisingly, the tape has held it on pretty well.
The only problem is that since the wire is so thin, it breaks easily. So if you accidentally get snagged on it on the way into or out of the door, you're likely to break it where it's stapled into the door. But we've only broken it in a couple places so far and it's nothing another staple or two couldn't fix.
Finished
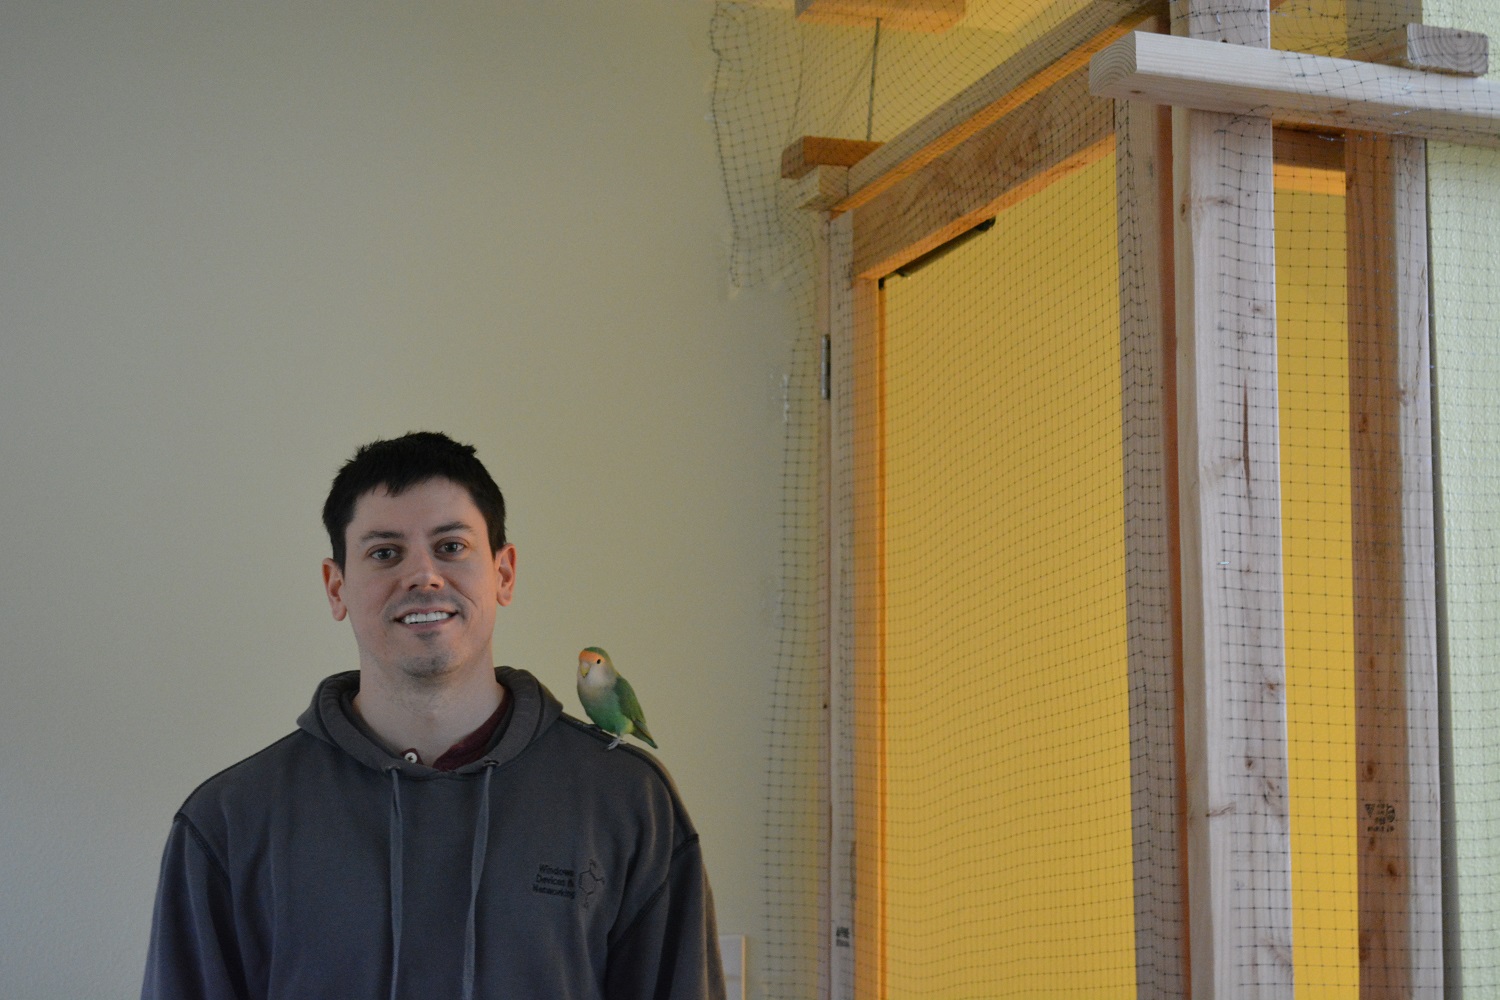
Here's what the final product looks like.
Lessons
After having used the bird door for the last year, I'd say that it's worked out even better than I imagined. It allows us to come and go without worrying about the bird's safety. I'm especially pleased that I haven't had to do any repairs, adjustments, or maintenance at all to the door during that time. Since I've never made anything like this before, I was expecting something to have to deal with some problems when we started using it on a daily basis. But it really has held up quite well.
If I were going to start over and do it again, there are a few things I'd consider changing:
- I'd add another 2x4 going horizontally across the middle of the door so that you have something to push against. As it is, you can't really push the door open with your body when you have your hands full because there's nothing to push against except the BirdBlock.
- Speaking of the BirdBlock, I'd consider using something stronger. The fact that it's so easy to break is a little annoying. However, whatever I replaced it with would still need to be flexible enough to wrap around corners. Also, it would probably need to be light enough to allow being taped to the wall.
- I wouldn't cut the half-lap joints entirely by hand. That took forever. Since I did that, I've learned that the more typical technique would be to cut a bunch of slots with a circular saw, knock out the remaining pieces with a hammer, and then clean it up with a chisel. See https://youtu.be/179pW3p7RI8?t=188
- I would probably use real joints (i.e. something other than a butt joint) for the frame so that it would stay rigid on its own, without the clamps holding it. However, that would also mean I'd have to be more careful to make the frame and door the right size and keep them square.
This was a pretty fun project for me. I'm a pragmatic guy, so I enjoy building things that are going to be useful for me. And this is something that I use every day. Plus, the constraint of not modifying our apartment presented some interesting problems to solve. Another reason I liked this project was that I got to learn a lot about building physical stuff, which is something I don't have much experience with. I also accumulated several new tools that I can use on future projects.
Anyway, I hope you found this interesting. Thanks for reading!