Learning robotics with the .NET Micro Framework
2013-07-27I’ve recently started playing around with robotics and the .NET Micro Framework (NETMF). I guess all the cool kids are using Arduino or Raspberry Pi instead, but I like the idea of being able to write in C# and use Visual Studio. So I bought a FEZ Cobra II mainboard and played with it all weekend.
I thought I’d just list a few of the things I learned about the board here.
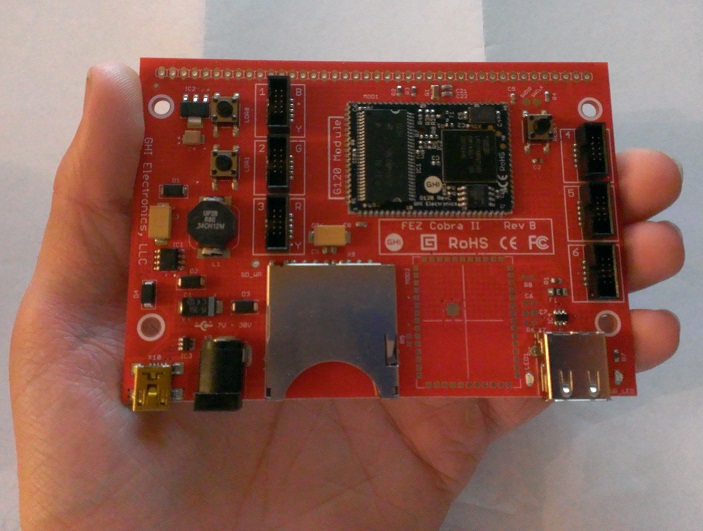
- Unfortunately, the first thing I learned about that mainboard is that the USB client connector (which is used to connect to the PC for power, deployment, and debugging) is the mini type B connector. Since the website didn’t say what type of connector it was, I had looked at the pictures and assumed it was the micro type B connector, which I already had a cable for. So I ended up way overpaying for a cable at Radio Shack because I didn’t want to wait for one in the mail (I was excited to try it out).
- When I ordered the board I was wondering whether the alternative power connector is the same type used for laptops. The website didn’t say. Being new to this, I didn’t even know what to call the connector. After some searching, there doesn’t seem to be an official name per se. Some places call it a barrel jack. Wikipedia calls it a coaxial power connector. Many places just refer to its dimensions: 2.1 mm (inner diameter) x 5.5 mm (outer diameter). Anyway, it’s pretty easy to find batteries and chargers with that connector. And once I received the board, I confirmed that indeed it is the same type as my laptop and that my laptop power supply will power the board.
-
From looking at the pictures and schematics, I could see that there were some buttons and LEDs on the board. I wasn’t sure if I’d actually be able to use those from my programs or not. For example, one of the buttons is the reset button, which can’t be used by programs because pressing the button reboots the board. The other two buttons are labeled “LDR0″ and “LDR1″. I believe they’re used when updating the bootloaders (there’s more than one, apparently), but I haven’t had to do that yet. I’m happy to report that those buttons can easily be used as inputs. You just have to read from the right pin (which you can find by looking at the schematic):
var button = new Microsoft.SPOT.Hardware.InputPort(GHI.Hardware.G120.Pin.P0_22, true, Microsoft.SPOT.Hardware.Port.ResistorMode.PullUp);
var value = button.Read();
Similarly, one of the LEDs is the power indicator, but it’s easy to use the other one.
