Folding whiteboard worktable

Comments

Now that I’m getting into robotics, I need a place to work on my robot. Since I live in an apartment, a small table would be good for now. I want it to be foldable, so it won’t take up too much space when I don’t need it. I’d also like to be able to move it easily so I can take it outside when I want to do things like cut wood. And I also want to be able to easily bring it with me to a new apartment next time I move.

I was just going to buy a cheap folding table, but I decided that this would be a good opportunity to practice some basic building skills. I need the practice because I really have no experience with building physical things. I never even took shop class.

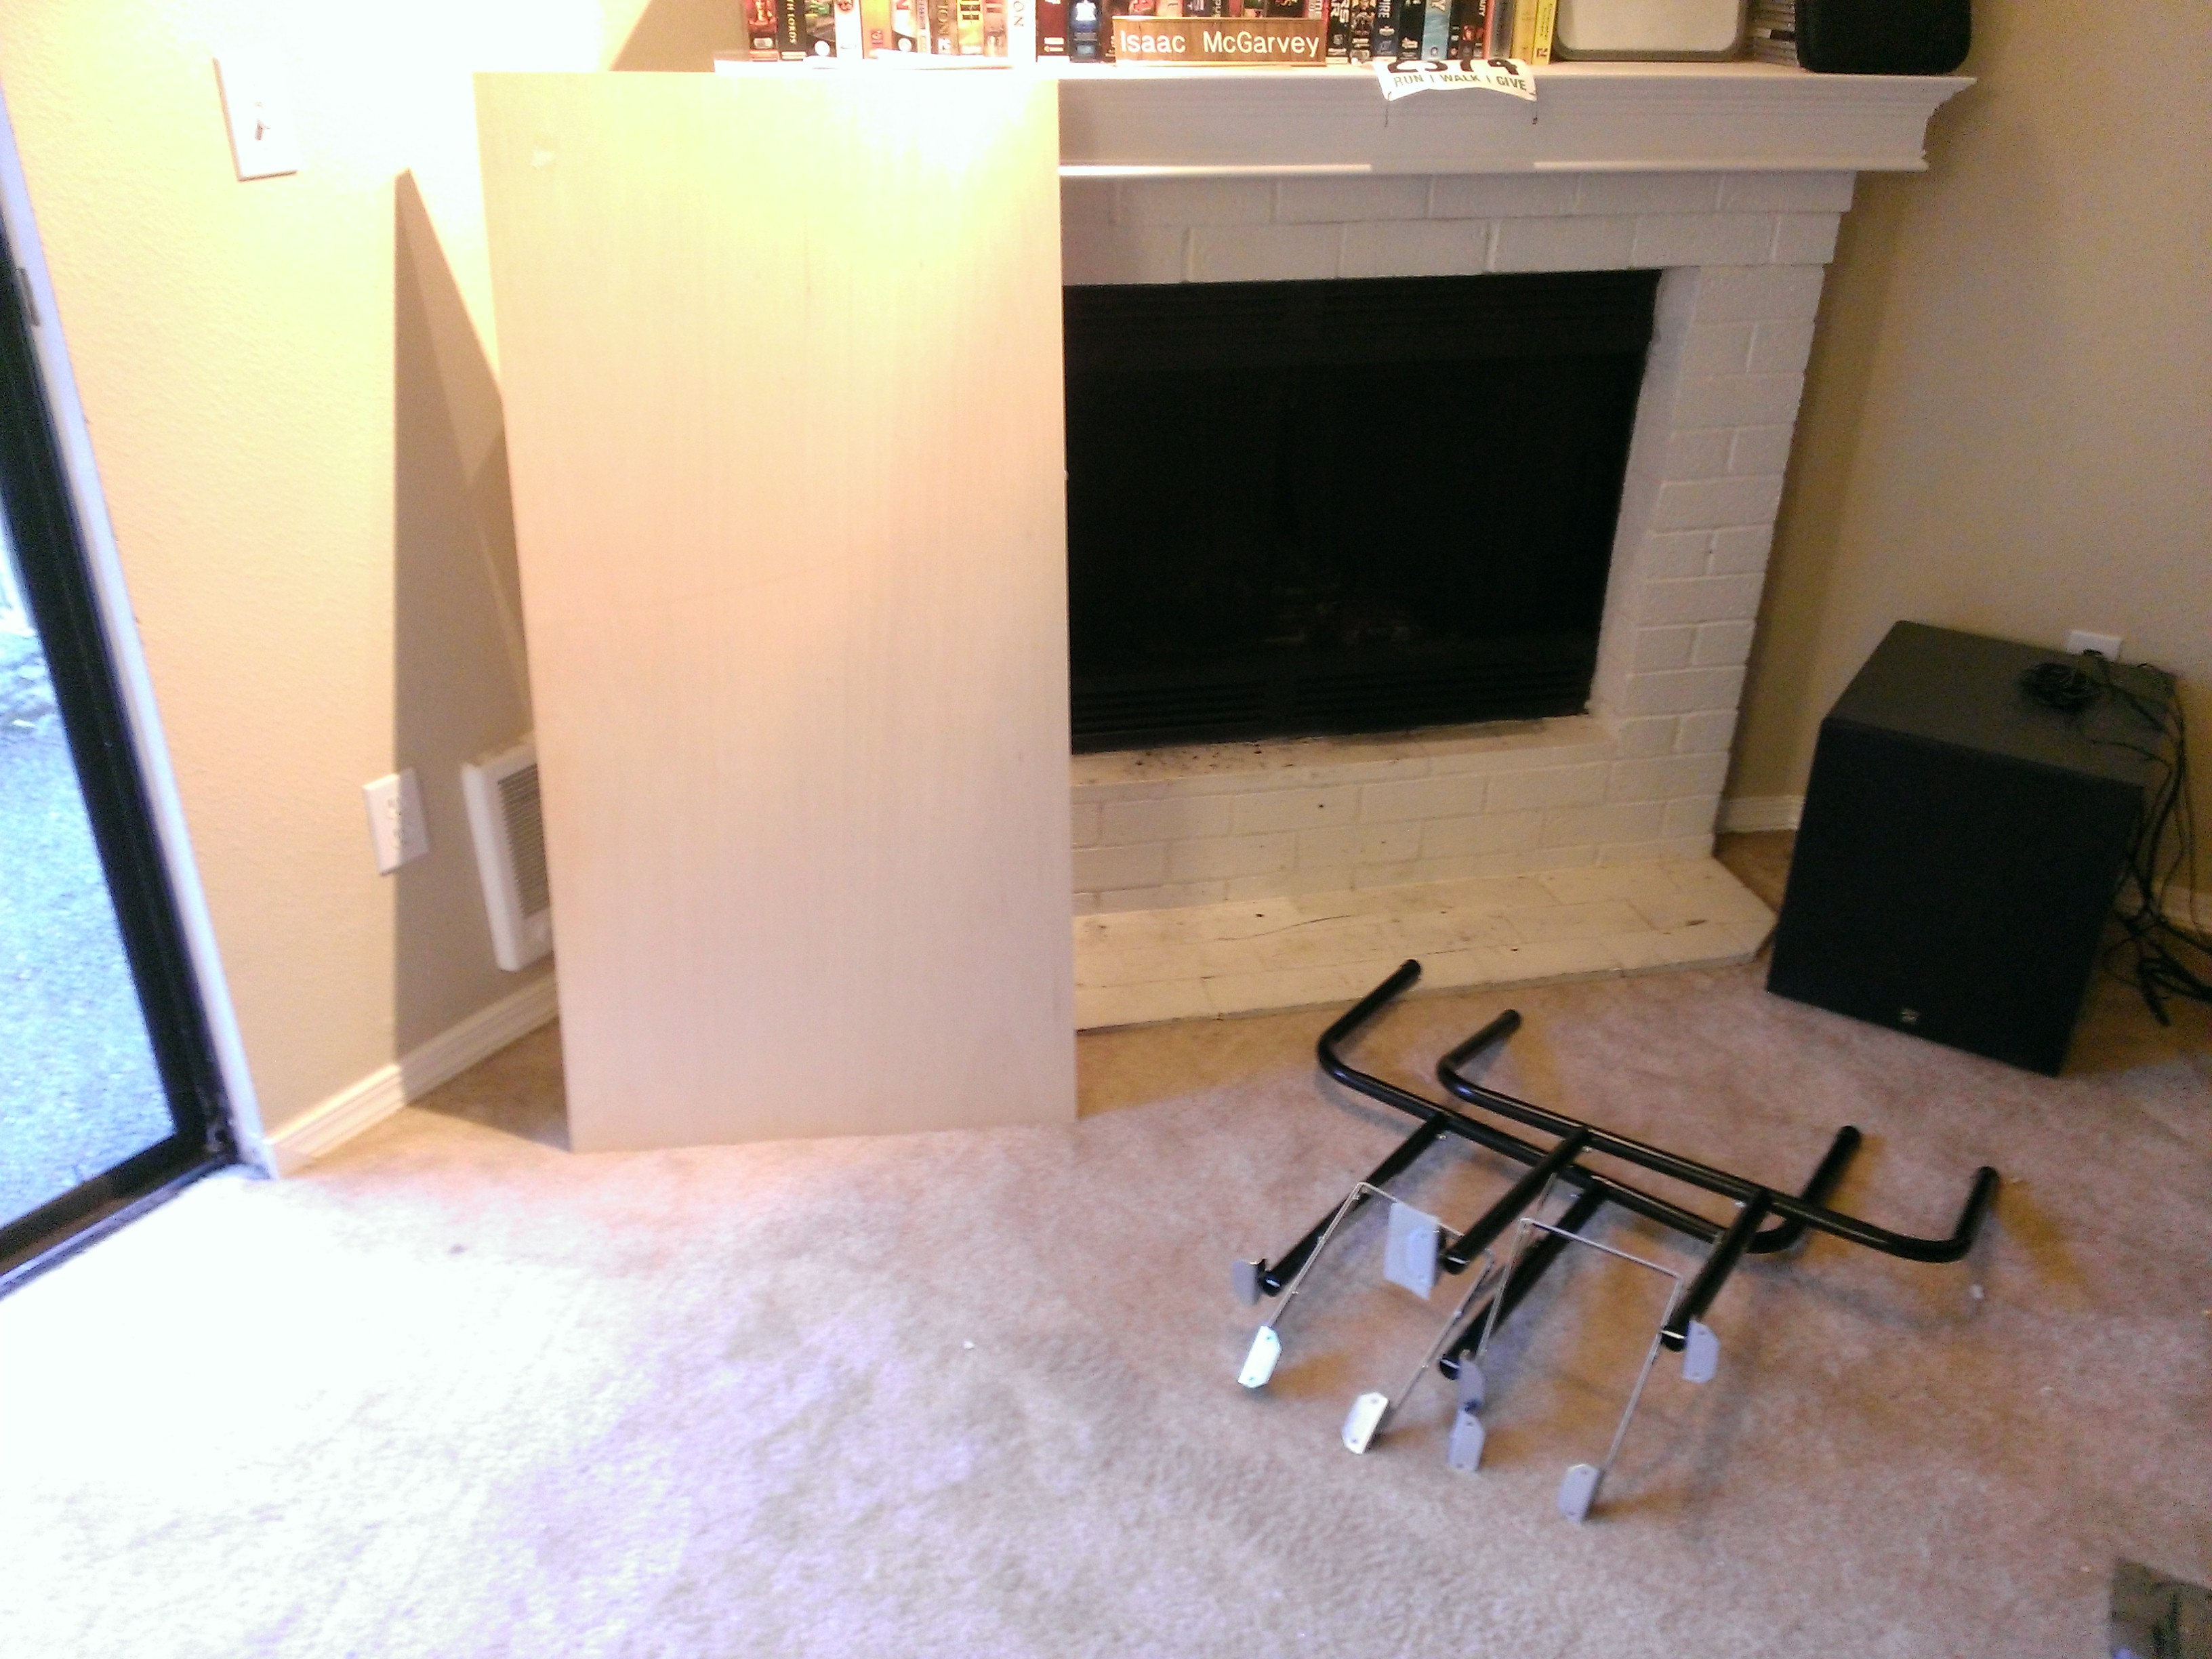
I was thinking about following these plans and building it entirely myself. The problem is that table is larger than I wanted it to be. At 69 in. x 30 in., it seemed like it would be difficult to move around. And I would need to rent a truck just to bring home the lumber. I thought about modifying that design to be smaller, but I realized that the way the folding legs are designed, the table has to be that long in order for the legs from both sides to have enough room to fold under.

Then I got the idea to look for pre-made folding legs and I found these ones from Home Depot. I figured using those along with a smaller tabletop would be a good compromise between just buying a table and building one entirely from scratch. I’d seen a large whiteboard surface at Home Depot previously for about $10 and thought that would be a pretty cool surface for the table. I decided to go with that, and bought the following materials, in addition to the folding legs:

  • 3/16 in. x 2 ft. x 4 ft. whiteboard panel (example)
  • 3/4 in. x 2 ft. x 4 ft. plywood panel (example)
  • #6 flat head (countersunk) screws, 1/2 in. length

WP_20130808_004

Fortunately, those 2 ft. x 4 ft. panels fit nicely in the back seat of my car. The folding legs came with all the necessary nuts, bolts, and screws for attaching them to the panel. The other screws I bought were for attaching the whiteboard panel to the plywood panel. I also had to buy some tools:

  • Drill
  • Drill bit set
  • Countersink drill bit
  • C clamps

Assembling the table was pretty easy. I followed the instructions for the folding legs to attach them to the plywood panel. Then, I put the whiteboard panel on top of the plywood panel, clamped it down, and marked four spots for screws to attach it.

WP_20130808_007

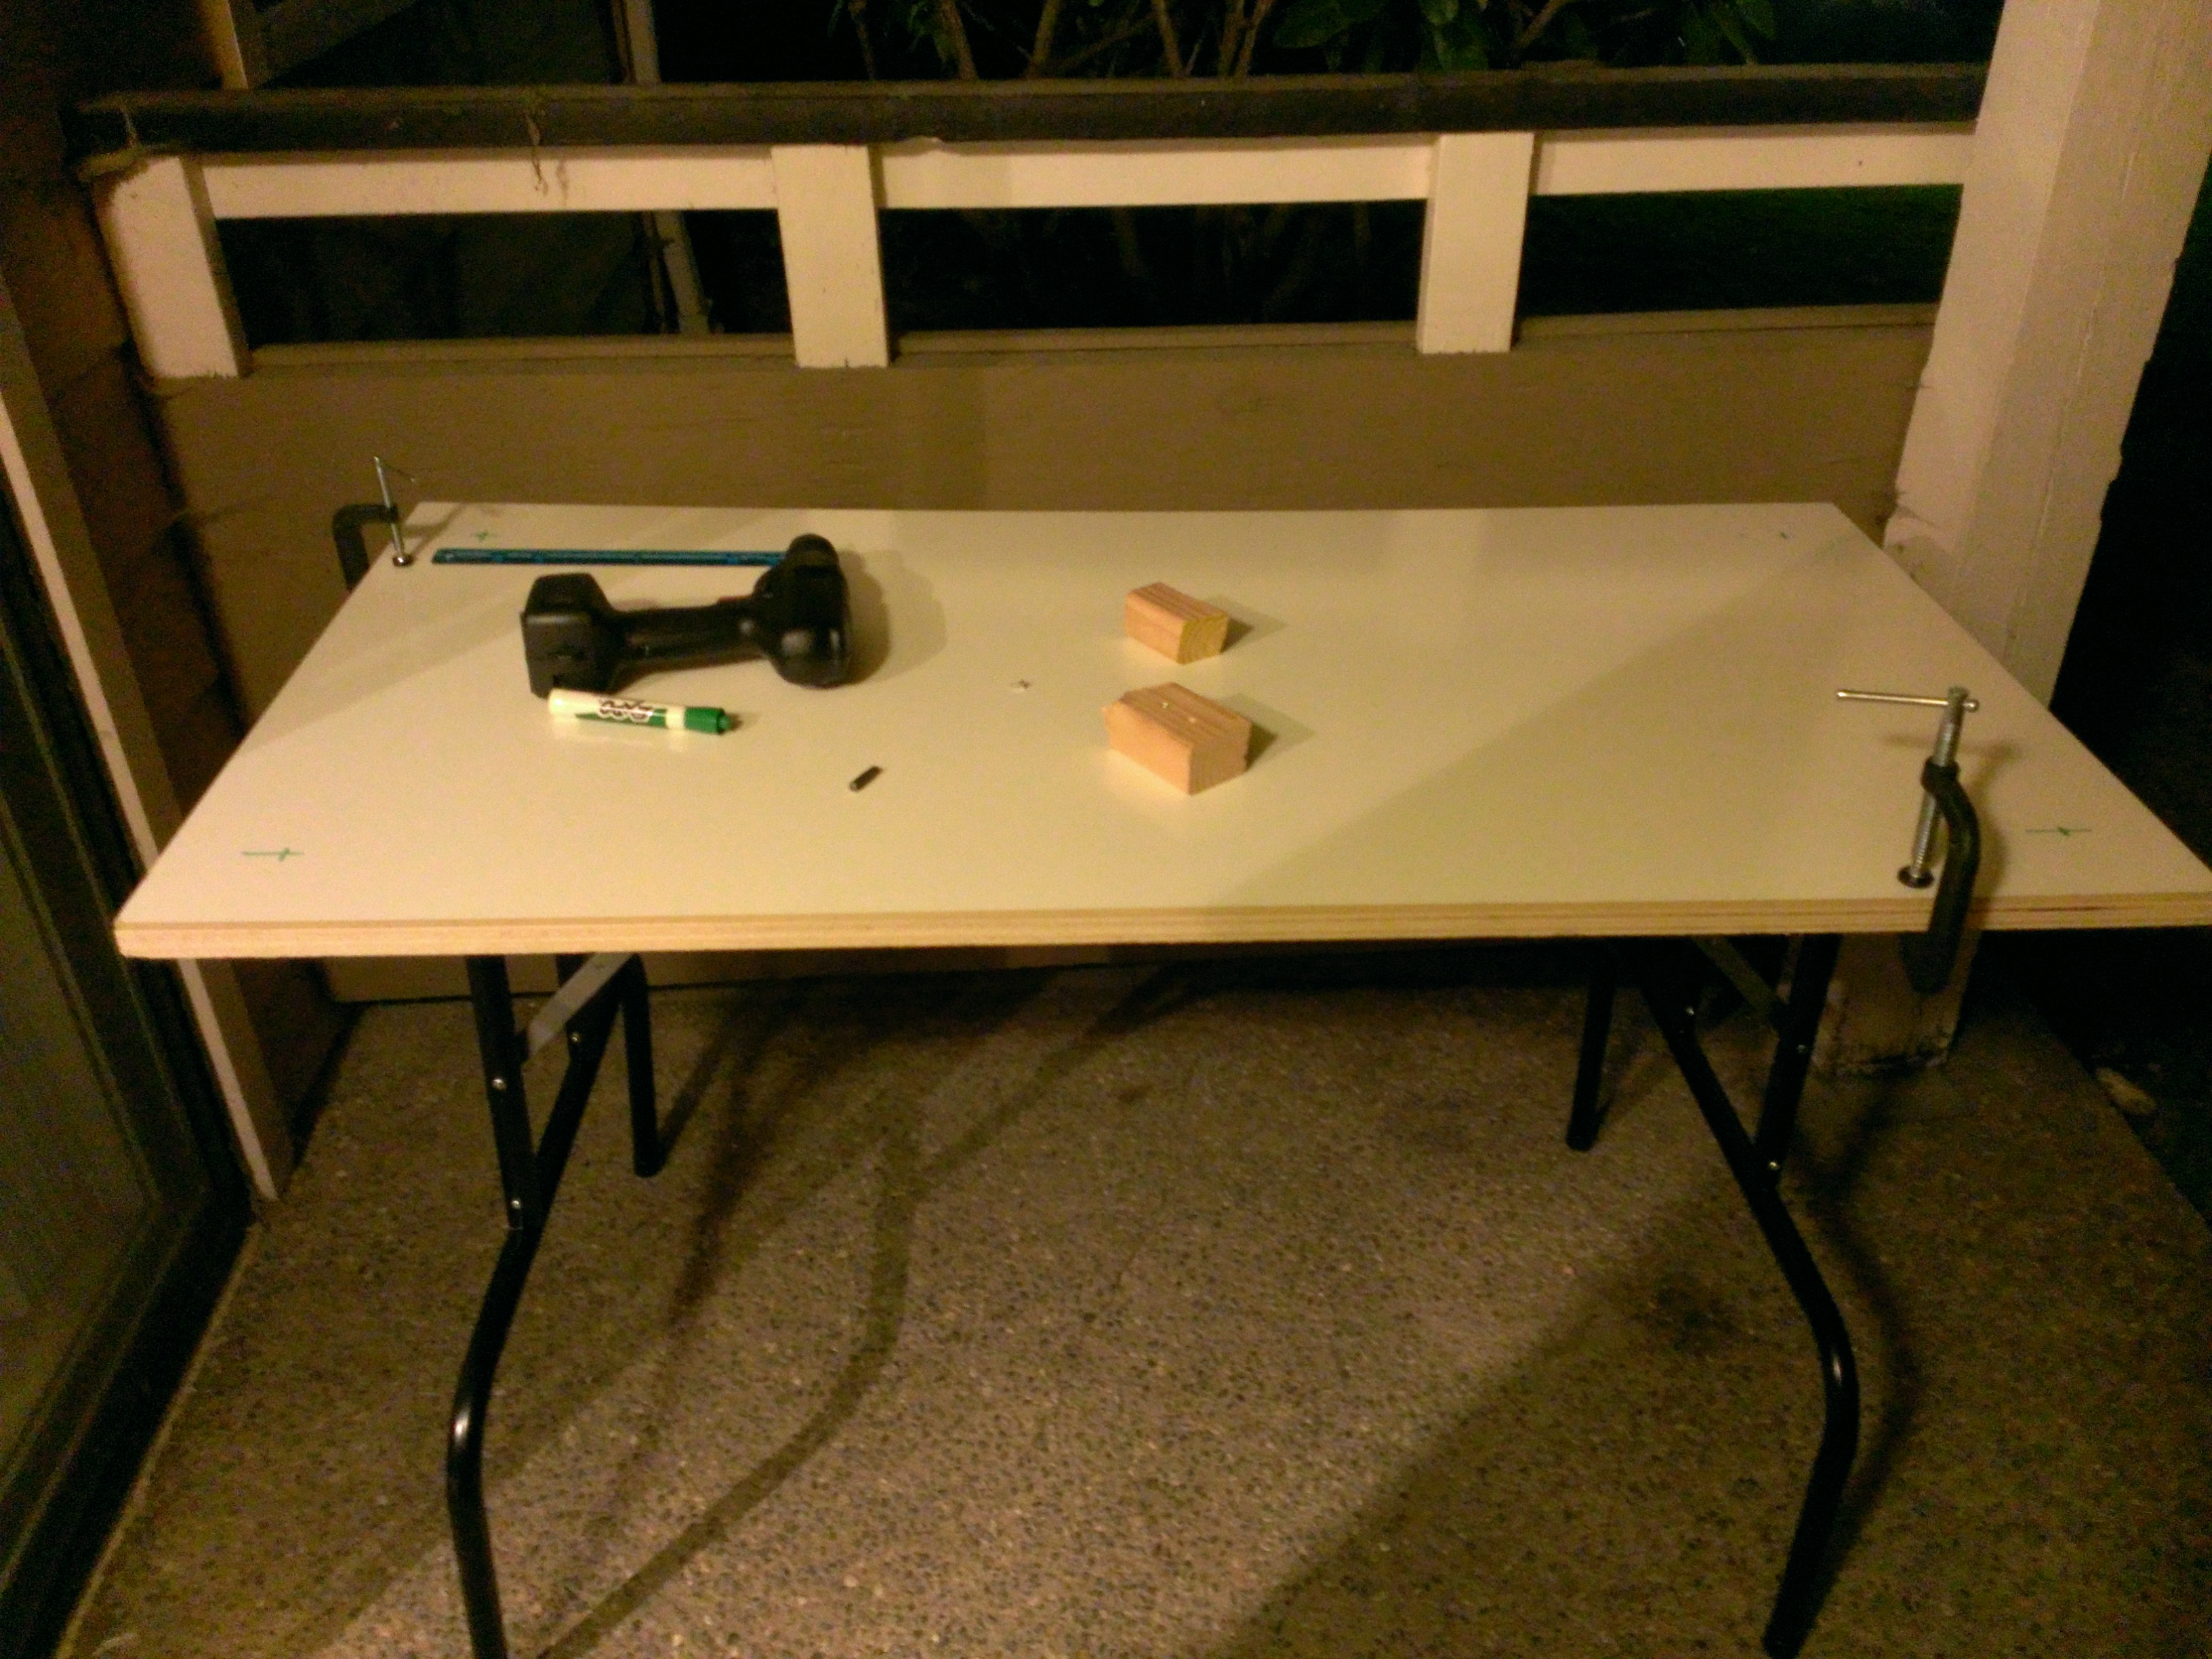
I drilled holes all the way through the whiteboard and into the plywood, about 1/2 inch deep in total. I used tape to mark the 1/2 inch depth on my drill bit so I wouldn’t go too far and come out the other side of the plywood.

drill depth

After I drilled the holes, I used the countersink bit so that the screws would be flush with the surface of the whiteboard, then put in the screws.

table

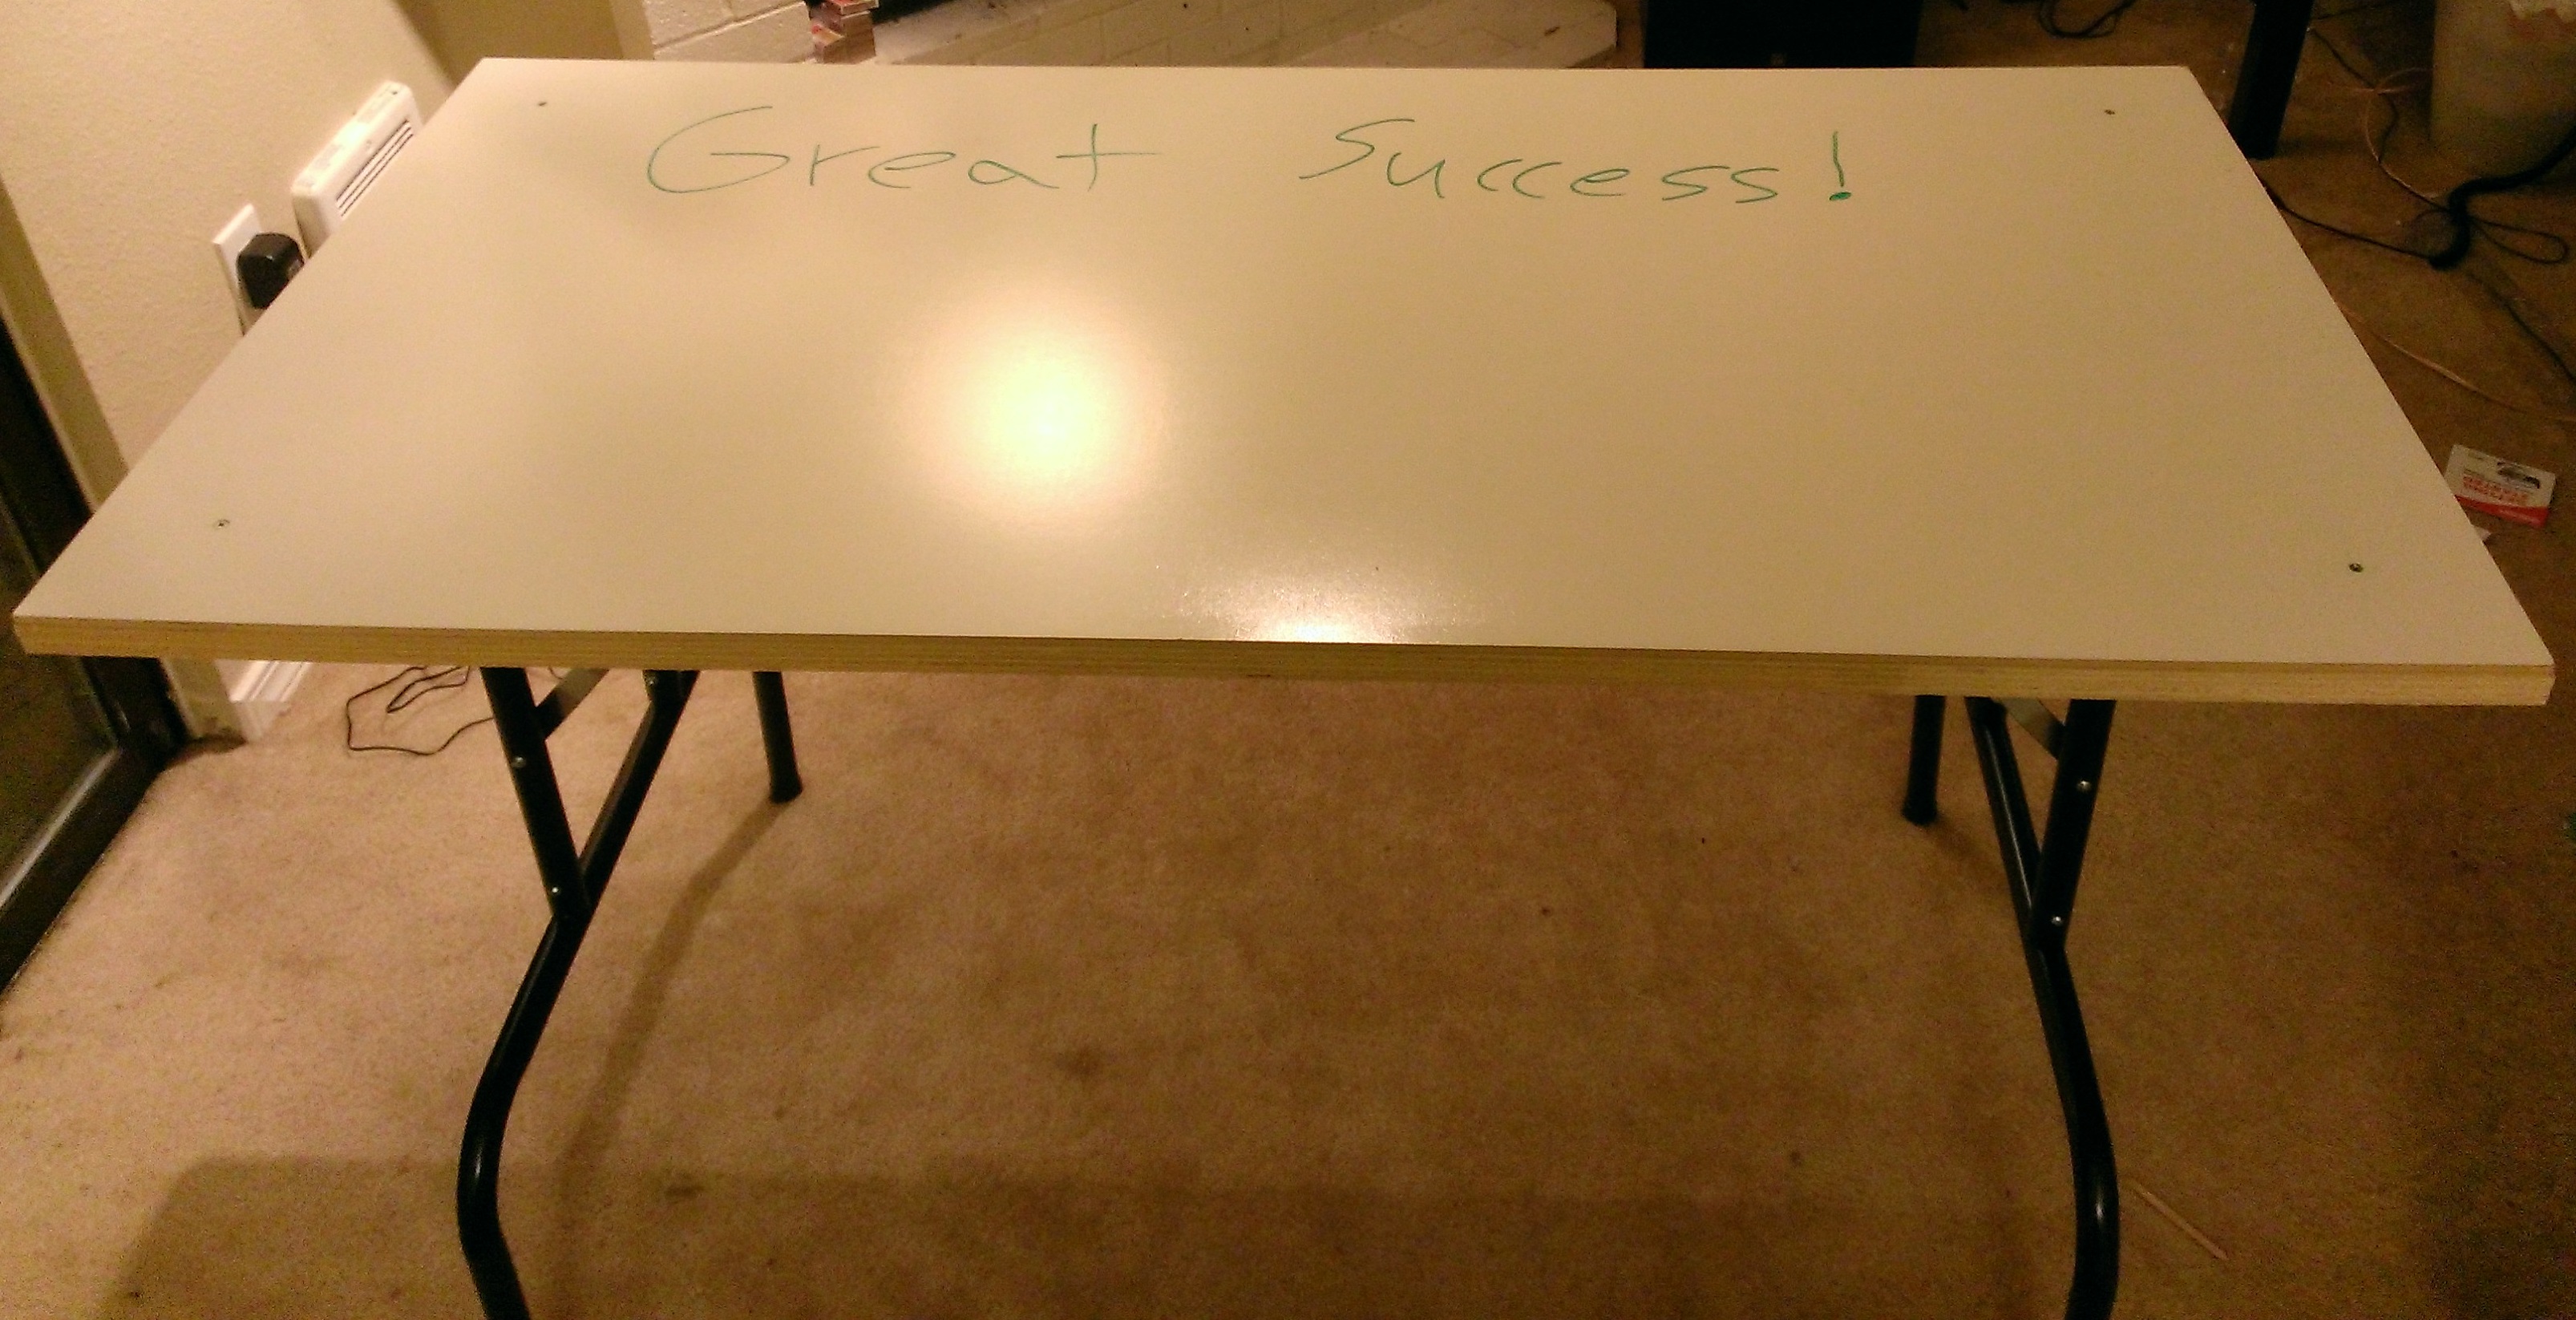
So far, I’m liking the table. I haven’t written much on it yet. I will say that it’s pretty tough to erase the board, but that’s alright — I didn’t expect a high-quality, large whiteboard surface for $10. The legs seem very sturdy. The downside there is that they’re not very easy to fold and unfold. But it’s not a problem because the table is small enough that I can move it around and even take it outside without folding it up. Not including tools, I probably spent about twice what I would have just buying a table. But for me, it was worth it to have the whiteboard surface and also just for the building practice.

Learning robotics with the .NET Micro Framework

Comments

I’ve recently started playing around with robotics and the .NET Micro Framework (NETMF). I guess all the cool kids are using Arduino or Raspberry Pi instead, but I like the idea of being able to write in C# and use Visual Studio. So I bought a FEZ Cobra II mainboard and played with it all weekend.

FEZ_Cobra_II

I thought I’d just list a few of the things I learned about the board here.

  1. Unfortunately, the first thing I learned about that mainboard is that the USB client connector (which is used to connect to the PC for power, deployment, and debugging) is the mini type B connector. Since the website didn’t say what type of connector it was, I had looked at the pictures and assumed it was the micro type B connector, which I already had a cable for. So I ended up way overpaying for a cable at Radio Shack because I didn’t want to wait for one in the mail (I was excited to try it out).
  2. When I ordered the board I was wondering whether the alternative power connector is the same type used for laptops. The website didn’t say. Being new to this, I didn’t even know what to call the connector. After some searching, there doesn’t seem to be an official name per se. Some places call it a barrel jack. Wikipedia calls it a coaxial power connector. Many places just refer to its dimensions: 2.1 mm (inner diameter) x 5.5 mm (outer diameter). Anyway, it’s pretty easy to find batteries and chargers with that connector. And once I received the board, I confirmed that indeed it is the same type as my laptop and that my laptop power supply will power the board.
  3. From looking at the pictures and schematics, I could see that there were some buttons and LEDs on the board. I wasn’t sure if I’d actually be able to use those from my programs or not. For example, one of the buttons is the reset button, which can’t be used by programs because pressing the button reboots the board. The other two buttons are labeled “LDR0″ and “LDR1″. I believe they’re used when updating the bootloaders (there’s more than one, apparently), but I haven’t had to do that yet. I’m happy to report that those buttons can easily be used as inputs. You just have to read from the right pin (which you can find by looking at the schematic):
    var button = new Microsoft.SPOT.Hardware.InputPort(GHI.Hardware.G120.Pin.P0_22, true, Microsoft.SPOT.Hardware.Port.ResistorMode.PullUp);
    var value = button.Read();

    Similarly, one of the LEDs is the power indicator, but it’s easy to use the other one.

Minecraft server in Azure

Comments

I’ve been running a Minecraft server on my local machine for a while, but only turning it on when I’m using it. I’m going on vacation soon and I thought it would be fun to set one up in Windows Azure instead. In addition to the fun of setting it up, it would allow me to play while I’m gone without having to leave my desktop on at home or copying the world to my laptop for trip and then copying it back when I return.

Anyway, now that Azure has IaaS support, setting up the server was really easy. I found a great video tutorial that describes the process in-depth. I didn’t think it would be that easy because of how Minecraft just stores the world locally. But you can just mount a drive in your VM that is backed by your storage account and it will persist automatically.

I found that an extra small instance worked fine for a couple people on a small world. But I’m guessing you’d want to move up to a small instance if you had any real load. Another thing I learned is that Azure supports sparse storage of drives. I set up a 10 GB data drive for the world, but the world is actually much smaller than that. When I looked at my bill, it showed less than 1 GB in usage.